Lab Tools in Blood Lab are mainly for controlling space, positioning Test Subjects, creating repeatable danger tests, and cleaning the room afterward. Start with the layout and surfaces, use Chairs, Walls, or Double Barrier when you need a subject held in a more consistent position, and choose Mop or Clear All based on whether you want to preserve part of the experiment. Glass and Lava are environmental hazards, not ordinary damage tools, so treat their results separately from weapon or blood-loss tests.
Blood Lab lab tools at a glance
Use this catalog to choose the right object for the job. The “confirmed role” column describes what the current evidence supports; it does not turn an observed interaction into a precise damage value, collision rule, or unlock condition. For repeatable body-part tests, pair these room objects with the Test Subject setup rather than changing several variables at once.
| Lab tool or area | Supported role | How to use it | Important limit |
|---|---|---|---|
| Chairs | Seat or hold a Test Subject in a chosen position for testing | Place or use the chair in the laboratory scene, then move the subject into it | The complete chair-control rules are not confirmed |
| Walls | Support, block, or pin a subject; a pushed subject may slide along the wall | Use the built-in wall as a boundary or positioning surface | The exact collision behavior can vary with the interaction |
| Double Barrier | Add another blocking or separating surface | Select it from the available tool equipment and place it between the subject and test area | Its full collision and protection behavior is not confirmed |
| Glass | Create a dangerous environmental boundary | Keep the subject away when you want to avoid the glass hazard; approach only for a deliberate test | The trigger distance and damage mechanism are not confirmed |
| Lava | Provide a severe or potentially fatal environmental hazard | Move a Test Subject into or toward the lava during an environment test | The current evidence does not separate its damage from other death causes |
| Floors / Ground | Receive blood, bodies, and experiment residue | Use the floor as the surface where blood spreads and cleanup can be observed | The spread pattern is visual and situational rather than a stated numeric rule |
| Gallery | Provide an observation or display area in the laboratory layout | Move to the gallery as part of the room setup | A special gallery interaction or reward is not confirmed |
| Room Layouts | Change the arrangement of walls, floors, glass, and other areas | Select a laboratory room or layout before setting up the subject | The number of layouts and their unlock conditions are not confirmed |
| Mop | Clean blood and residue from a selected area | Use it when you want local cleanup while leaving other experiment areas intact | The exact cleanup radius is not confirmed |
| Clear All | Remove blood, bodies, and other residue throughout the laboratory | Choose the clear-all option after an experiment when a full reset of visible residue is useful | It is broader than the Mop and may remove useful traces |
| Laboratory Reset / Recreate | Rebuild or switch the current laboratory room | Recreate the lab when the current room is too messy or when another room is needed | What happens to subjects, weapons, or spawned objects is not confirmed |
The table is a planning guide rather than a complete inventory. The available summary confirms the named areas and tools, but it does not provide a full list of layouts, fixed prices, damage values, trigger ranges, or unlock requirements. If the current in-game panel shows a different label or arrangement, follow that panel for the live object name.
Set up a repeatable experiment
A useful lab setup begins with the room, not the weapon. Choose a Room Layout or laboratory area first, then decide where the Test Subject should stand. A Chair is the most direct positioning choice when you want a subject seated or held in a specified place. Walls can provide a boundary or support surface, while a Double Barrier gives you another separation surface when the subject and the test area need to be kept apart.
This arrangement matters because the same action can look different when a subject is free to move. The material records a subject being pinned to a wall and another subject sliding along a wall during an experiment. That is enough to treat Walls as meaningful positioning surfaces, but not enough to promise that every push, impact, or weapon will stop in exactly the same way. Build a short test around one surface and one action before adding more objects.
A simple setup is:
- Select the room or layout that gives you the needed floor, wall, glass, or hazard.
- Put the subject near the chosen positioning surface.
- Use the Chair, Wall, or Double Barrier to establish the intended position.
- Perform one weapon or environment test while watching the subject and the surrounding surface.
- Record the visible result before moving the subject or adding another hazard.
Keep the subject away from Glass unless the purpose is to test that hazard. The video warns that approaching the glass can cause death. It does not establish a safe distance, a fixed hitbox, or whether every death near glass uses the same mechanism. That makes Glass a poor choice for a baseline weapon comparison, but a useful separate environment test when you are prepared for the subject to be lost.
Positioning subjects with Chairs, Walls, and Barriers
Chairs, Walls, and Double Barrier solve related but different positioning problems. A Chair is best when the goal is a seated or stationary-looking setup. A Wall is useful when the experiment depends on a boundary, a pinning attempt, or observing movement along a surface. A Double Barrier is the clearest choice when you need an additional obstacle between two sides of the test.
Do not treat these objects as interchangeable armor. The supplied material does not confirm that a barrier prevents a particular weapon, absorbs a known amount of force, or protects a subject from all environmental hazards. It only supports their use as physical layout and separation tools. If you need to compare two weapons, keep the same chair, wall, or barrier placement between trials and change only the weapon or target location.
The subject’s state also matters. A subject that stands up, slides, falls, or moves away is no longer in the same test position. Reset the placement before making a second observation rather than combining both outcomes. This is especially important for body-part tests, because a change in angle or distance can alter where the impact appears and where blood reaches the floor or wall.
Video moments for positioning Blood Lab test subjects
These moments show the Double Barrier equipment and a subject sliding along a wall, supporting the positioning and separation practices described in this section.

Glass, Lava, Floors, and the Gallery
Environmental areas should be read as parts of the room rather than as ordinary inventory items. Glass and Lava are dangerous destinations; Floors and Walls are surfaces that show what happened; the Gallery is an area used during laboratory setup or observation.
Glass has a confirmed warning attached to it: approaching it can cause death. Use that as a safety rule, not as a damage formula. Keep the subject and player clear of the glass while preparing a normal test. If you deliberately test it, do so after cleaning the room and without mixing in another injury source. Otherwise, you may not know whether the subject died from the glass, blood loss, or an earlier weapon action.
Lava is shown as a place where a subject can be sent, with severe or fatal consequences. The evidence does not confirm a separate lava damage value or prove that every lava death is identical. Treat it as a terminal environment test and do not use it to measure a weapon’s bleeding or impact behavior.
Floors and Walls are useful observation surfaces. Blood can spread onto the ground and reach the wall, so the visible trail may remain after the original action. That is why a clean room helps when comparing results: old blood can make a new wound look larger or make a previous experiment appear to still be active. The Gallery is mentioned as a place to move to while setting up the laboratory, but no independent reward or special interaction is confirmed. Use it for observation or layout changes only when the current room presents that option.
Video moments for Blood Lab room hazards and cleanup
These moments cover moving to the Gallery, recreating the laboratory, avoiding the dangerous glass, and distinguishing Mop from Clear All, matching the room setup, hazard, and cleanup guidance in this article.
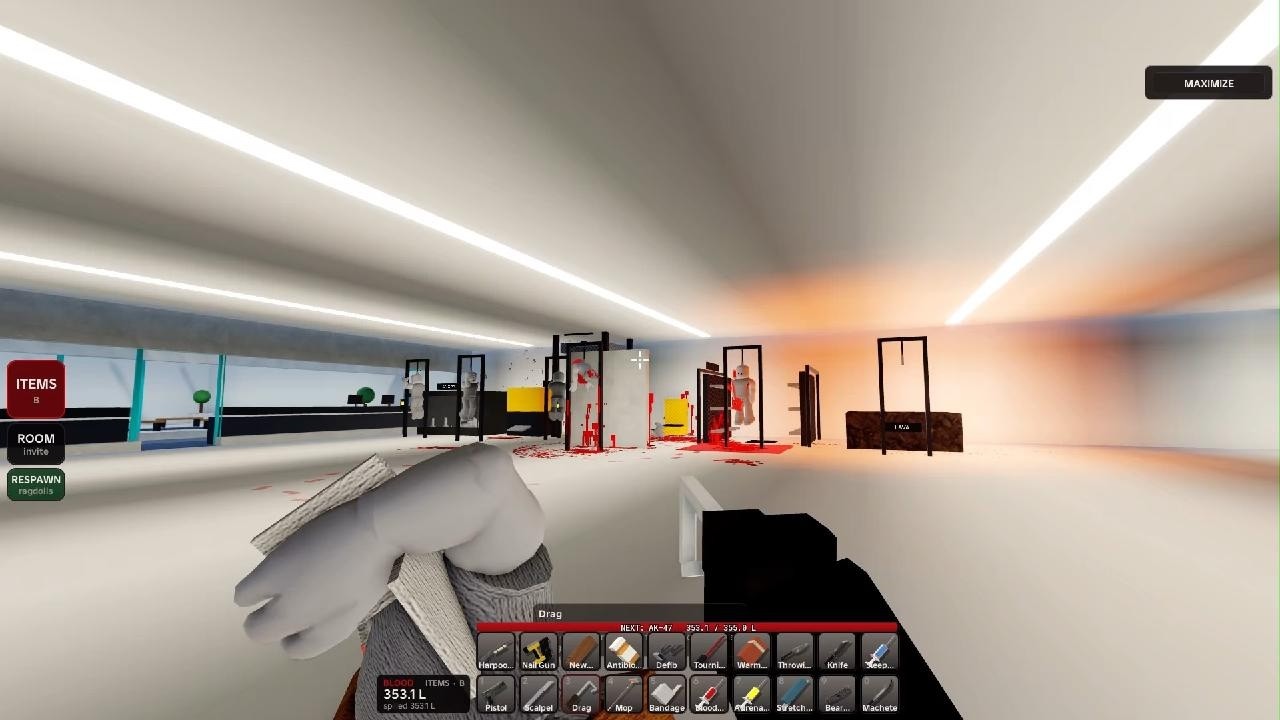
Clean locally or clear the whole lab
Choose cleanup based on what you still need to observe. Mop is the narrow option: the video distinguishes it from the clear-all choice and presents it as a way to clean a more limited area. Use it when you want to remove a blood trail or residue near one subject while preserving another area for comparison.
Clear All is the broad option. It is appropriate when the laboratory is too cluttered to read, when bodies and blood are no longer useful, or when you want a visibly empty room before a new setup. Because it removes the wider scene state, do not choose it immediately if you still need to compare a blood trail, a body position, or a previous impact.
A practical cleanup decision is:
- Use
Mopafter a local test when another experiment remains in the room. - Use
Clear Allafter the session when old subjects, blood, and residue are only obscuring the next setup. - Recreate the lab when changing rooms or rebuilding the overall scene is more useful than cleaning individual surfaces.
The cleanup tools should not be confused with healing. Removing blood or bodies changes the visible laboratory state; it does not confirm that a Test Subject has recovered, that a wound has closed, or that a weapon progression value has been restored. Use the medicine tools for a separate recovery test.
Recreate the lab and change rooms
When a room becomes too dirty or you need a different environment, use the laboratory recreate or room-change flow. The video mentions recreating the lab before continuing in another room. This establishes the purpose of the action—ending the current arrangement and preparing a new one—but not the exact button label or what every object carries over.
Before recreating, decide whether the current evidence is worth preserving. If you still need to inspect a blood trail, a wall slide, or a subject’s position, use the Mop or write down the observation first. If the room is no longer readable, Clear All may be faster. If the desired test requires another layout, recreate or change rooms rather than forcing the current space to imitate it.
Do not assume that recreation preserves Test Subjects, weapons, bodies, blood, or spawned objects. The supplied material does not confirm those retention rules. Treat the new room as a fresh setup: check the available surfaces, place the subject again, and confirm that the required tool is present before starting the next trial.
Limits to keep in mind
Lab Tools provide control over space and cleanup, not a confirmed independent damage system. Chairs, Walls, and Double Barrier help establish positions; Glass and Lava create environmental danger; Floors and Walls reveal residue; Mop and Clear All manage the visible aftermath. Their usefulness comes from making experiments easier to separate and repeat.
Several details remain intentionally open. The full Chair interaction, Double Barrier collision, glass trigger distance, lava damage behavior, Gallery function, layout count, unlock conditions, and reset carry-over rules are not confirmed. Avoid building a conclusion around an exact number or guaranteed protection effect for any of them.
For the cleanest comparison, use one room, one subject, one positioning arrangement, and one test action at a time. Observe the result, clean only what you no longer need, and recreate the lab when a different room is required. That workflow gives you the clearest practical use of Blood Lab’s tools without treating uncertain interactions as fixed mechanics.
First-time Blood Lab lab tools questions
Which tool should I use to clean only part of the laboratory?
Use Mop for local cleanup when you want to remove blood or residue from one area while leaving other experiment areas available to inspect. Use Clear All only when you want to empty the wider room.
Is Double Barrier confirmed to stop weapons or environmental hazards?
No. Double Barrier is confirmed as an available blocking or separating object, but its complete collision and protection behavior is not confirmed. Test it as a placement surface rather than assuming it guarantees protection from a weapon, Glass, or Lava.
Does recreating the lab preserve my subjects and objects?
The current evidence does not confirm what Laboratory Reset or Recreate preserves. Treat a recreated or changed room as a fresh setup and check the available layout, tools, and Test Subjects before continuing.
Can I use Glass as a safe boundary during a normal test?
No. The video warns that approaching Glass can cause death, while its trigger distance and exact damage mechanism remain unconfirmed. Keep clear of it unless the purpose of the experiment is specifically to test that environmental hazard.